While attending the Winemaker Magazine conference this year in San Diego, California, I thought I would be asked about how to make dessert wines. After all, I participated on a panel about them. However, I was surprised that most questions were about how to make the sparkling wine I had won an award for the previous year. It’s not easy to make a sparkling wine as it takes many steps beyond still wine. Because of these extra steps, there are more ways that a sparkler can go wrong. However, the end result is worth it as the bubbles will awe your friends and get you interesting questions at conference!
And although sparkling wine can be made by injecting carbonation (much like making beer) or by leaving the wine in champagne bottle and pouring off the additional lees introduced with the second fermentation, I prefer the méthode champenoise. This method pops the lees plug out of the wine at the end of the process, leaving you with a crystal clear bubbly!
These are my instructions, with details to help you make your own award winning champagne!
1. Make a still wine with high acidity, low sugar
My first batch of sparkler started with a full strength chardonnay. And although I was able to figure out how to freeze the neck to disgorge the wine, what I didn’t realize was that my wine already had too much alcohol to make the sparkler I wanted. In addition, it was not acidic enough to taste the way I wanted. Instead it was heavy and “beery.” It was a lesson learned to pick my base wine more carefully.
The base wine should be a naturally highly acidic wine. For my award winner, I chose Reisling and then mixed it with a Chenin blanc/Sauvignon blanc blend, but you could choose a Chardonnay, a Semillon or even a Blanc de Noir from Pinot noir grapes.
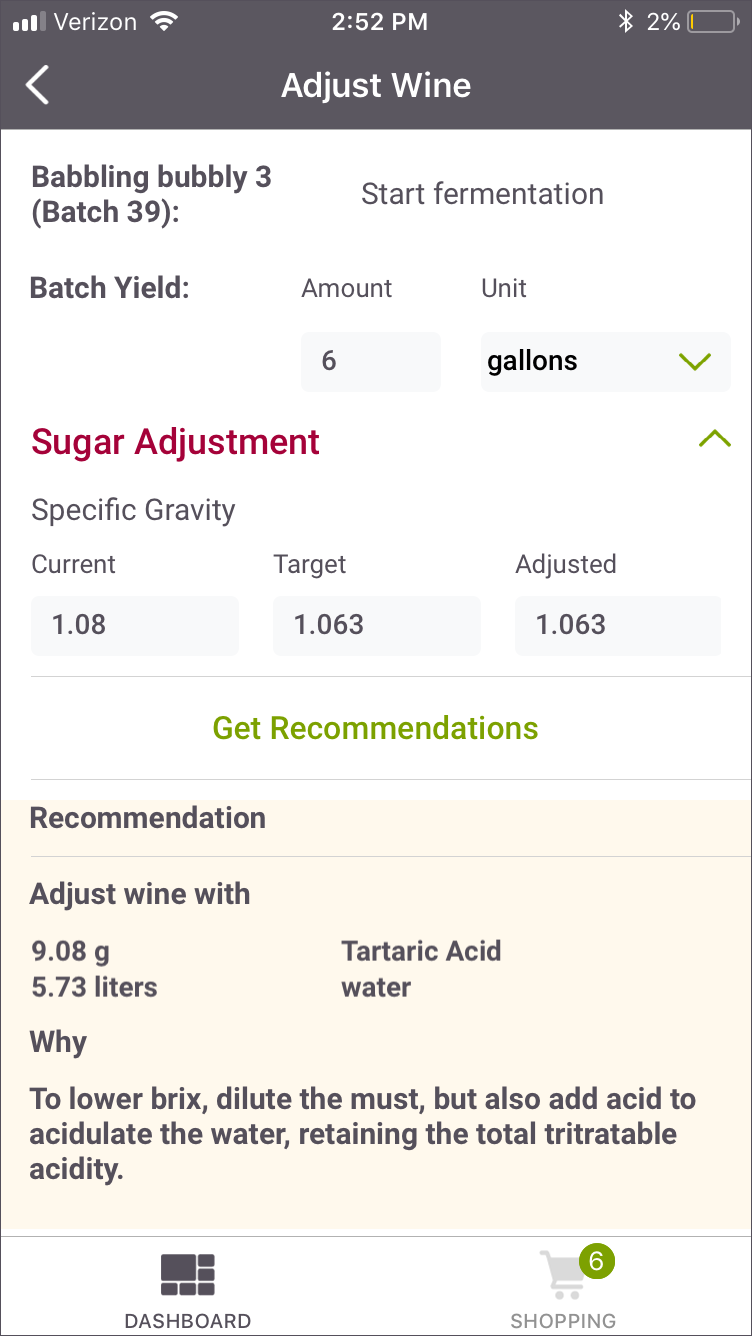
You can even start the sparkler with a kit wine. No matter what you start with, you may have to adjust your must to aim for a higher acid level and lower starting Brix.
Readings:
- Starting Specific Gravity/Brix: 1.065/17°
- Potential Alcohol: 9%
- Total acidity (pre-fermentation): above 8 grams per liter
2. Protect it carefully while clarifying
Once your wine is finished fermenting, you should go ahead and complete all the steps to clarify. You want to control any chance of pectin haze or tartrates once you put it back in the bottle for secondary fermentation. Protect it with 50 ppm potassium metabisulfite and add a finishing additive if you have one. I usually wait 3 months after the SO² addition, but rack just before the second fermentation in bottle. I’ve also cold stabilized my wine down to 32° F for 30 days to ensure any tartaric crystals drop out at this temperature. Since you don’t want to get your SO² levels too high, it’s best to keep the wine cool (down to 60° F, if you can) and topped up as close to the bung as possible during this period.
Any fining agent you put in at this stage will help the lees slide down the side of the champagne bottles later (See Riddle me this, below).
Ingredients needed:
- Potassium metabisulfite (.3 grams per gallon)
- Chitosan (5 ml per gallon) or Bentonite (2.5 grams per gallon)
Procedure
- When wine is finished fermenting, rack off gross lees into carboy.
- Add potassium metabisulfite and fining agent. Top up wine in carboy to within 1/4″ of the stopper.
- Keep temperature between 60-65° F and set aside for 2 months.
- Rack and top up wine in carboy to within 1/4″ of the stopper.
- Cold stabilize by placing in refrigerator at 32° F for at least 1 month.
Tips
- Important: If you started your wine with kit juice that came with potassium sorbate, throw it out! The potassium sorbate will prevent a refermentation in the bottle (not what you want in a sparkler). My second attempt at bubbly was from a Riesling kit, but I accidentally added the sorbate at clarification. I hit my forehead with a “Doh!” after my clarifying step, and that’s how my “Unbubbly Riesling” got it’s name! So I bought another kit and started again. Needless to say, I threw out the potassium sorbate as soon as I began the fermentation!
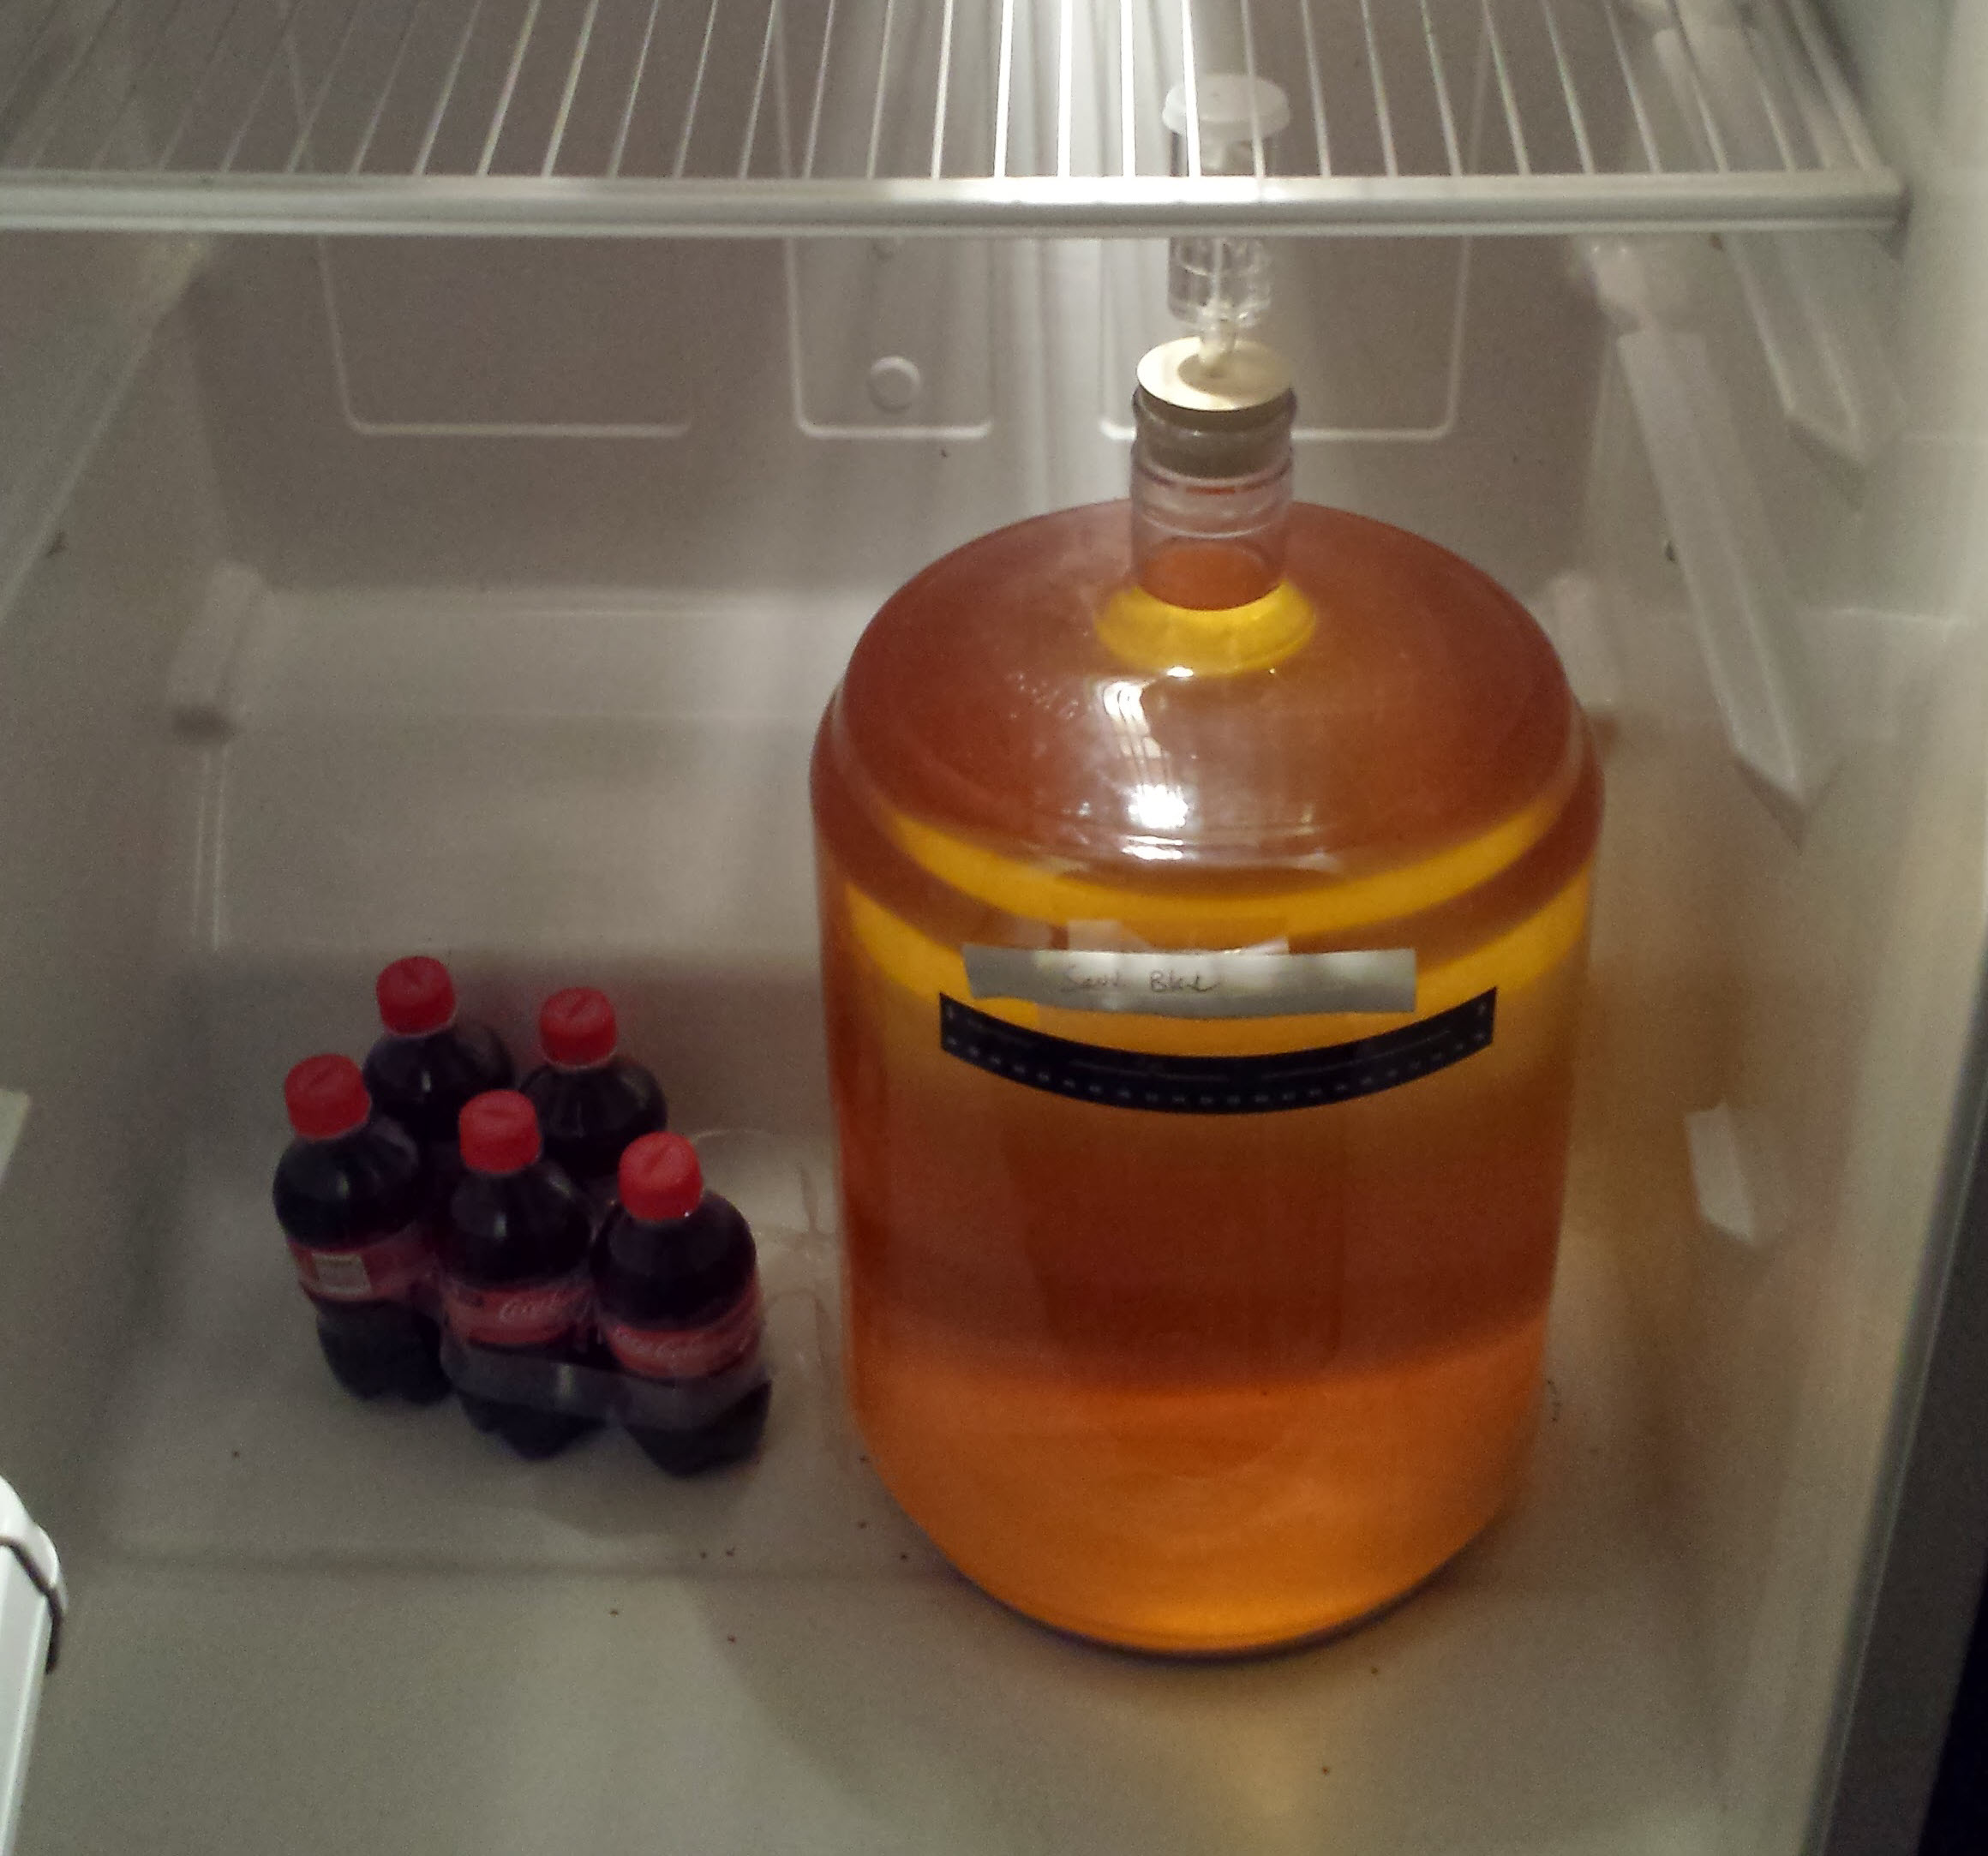
Your wine will cold stabilize down to the lowest temperature you can get it. But at 32° F, you may get exploding soda bottles! - Get an extra refrigerator: I am lucky enough to have a garage that can store an extra “drink” refrigerator. When I need to cold stabilize, I remove the sodas and beer and turn the temperature down to its lowest setting. I can fit up to 4 — 6 gallon carboys into the fridge at one time. If you have room, you can use this fridge for both cold stabilizing and for cold fermentation when needed (but cold fermentation is a topic for another article).
3. Inoculate with a yeast, sugar boost
The trick to sparkling is to trap CO² in the bottle, so after we have clarified our still wine, much of the CO² from the original fermentation will have dissipated. We will need to add additional yeast and sugar to sparkling bottles. But before this, remove 1 bottle of the still wine (or 750 ml) and cork it to use later to create a dosage (see Make a Dosage, below).
Once the sparkler is in the bottle, to help the yeast along and integrate the complex flavors in the wine, gently rock the bottles back and forth to stir the lees into the wine. The lees are the key to making great tasting sparkling wine.
By mixing the lees into the wine at the beginning of the bottling process, you’ll help the lees stay healthy and complete the re-fermentation.
Equipment needed:

Ingredients needed:
- Dextrose (or any easy to dissolve sugar) – 70 grams per gallon of wine
- Yeast (Red Star Premier Cuvée)
- Yeast nutrients
Procedure:
- Create a yeast starter according to package directions. In 15 minutes, increase the water portion to 250 ml and add 250 ml of wine. Allow to sit 1 hour. After 1 hour, add another 250 ml of wine. Allow to sit 1 hour.
- Sanitize your new champagne bottles and caps.
- Rack wine into primary fermenter while yeast starter is completing final hour.
- Stir sugar into wine until dissolved. Add yeast starter.
- Fill champagne bottles to within 1/4″ of top of bottle.
- Cap bottles. Store at 70-75° F for at least 10 days to help complete fermentation.
- Gently mix the wine by lifting each bottle and rock back and forth 2-3 times. Store bottles in wine box. Repeat daily for 3 months.
Tips:
-

The best bottle capper money can buy! Do not re-use sparkling bottles: Although you might be a environmentally or economically conscious and reuse bottles, I warn you not to re-use sparkling bottles. These bottles can get micro-fractures due to the pressure of the previous use that can be invisible to you. These stress fractures may cause the bottle to weaken under the new pressure of your sparkler. Fireworks might work on July 4th, but I don’t want them unexpectedly in my cellar!
- Rent a bench capper: After losing 1/3 of my bottles in my second batch of sparkling to unseated caps, I vowed I would never use a hand capper again! My local retailer provides bench cappers that push the cap evenly onto the bottles, just like a floor corker! We’ve made enough sparkling, cider and beer to make buying a bench capper worth it!
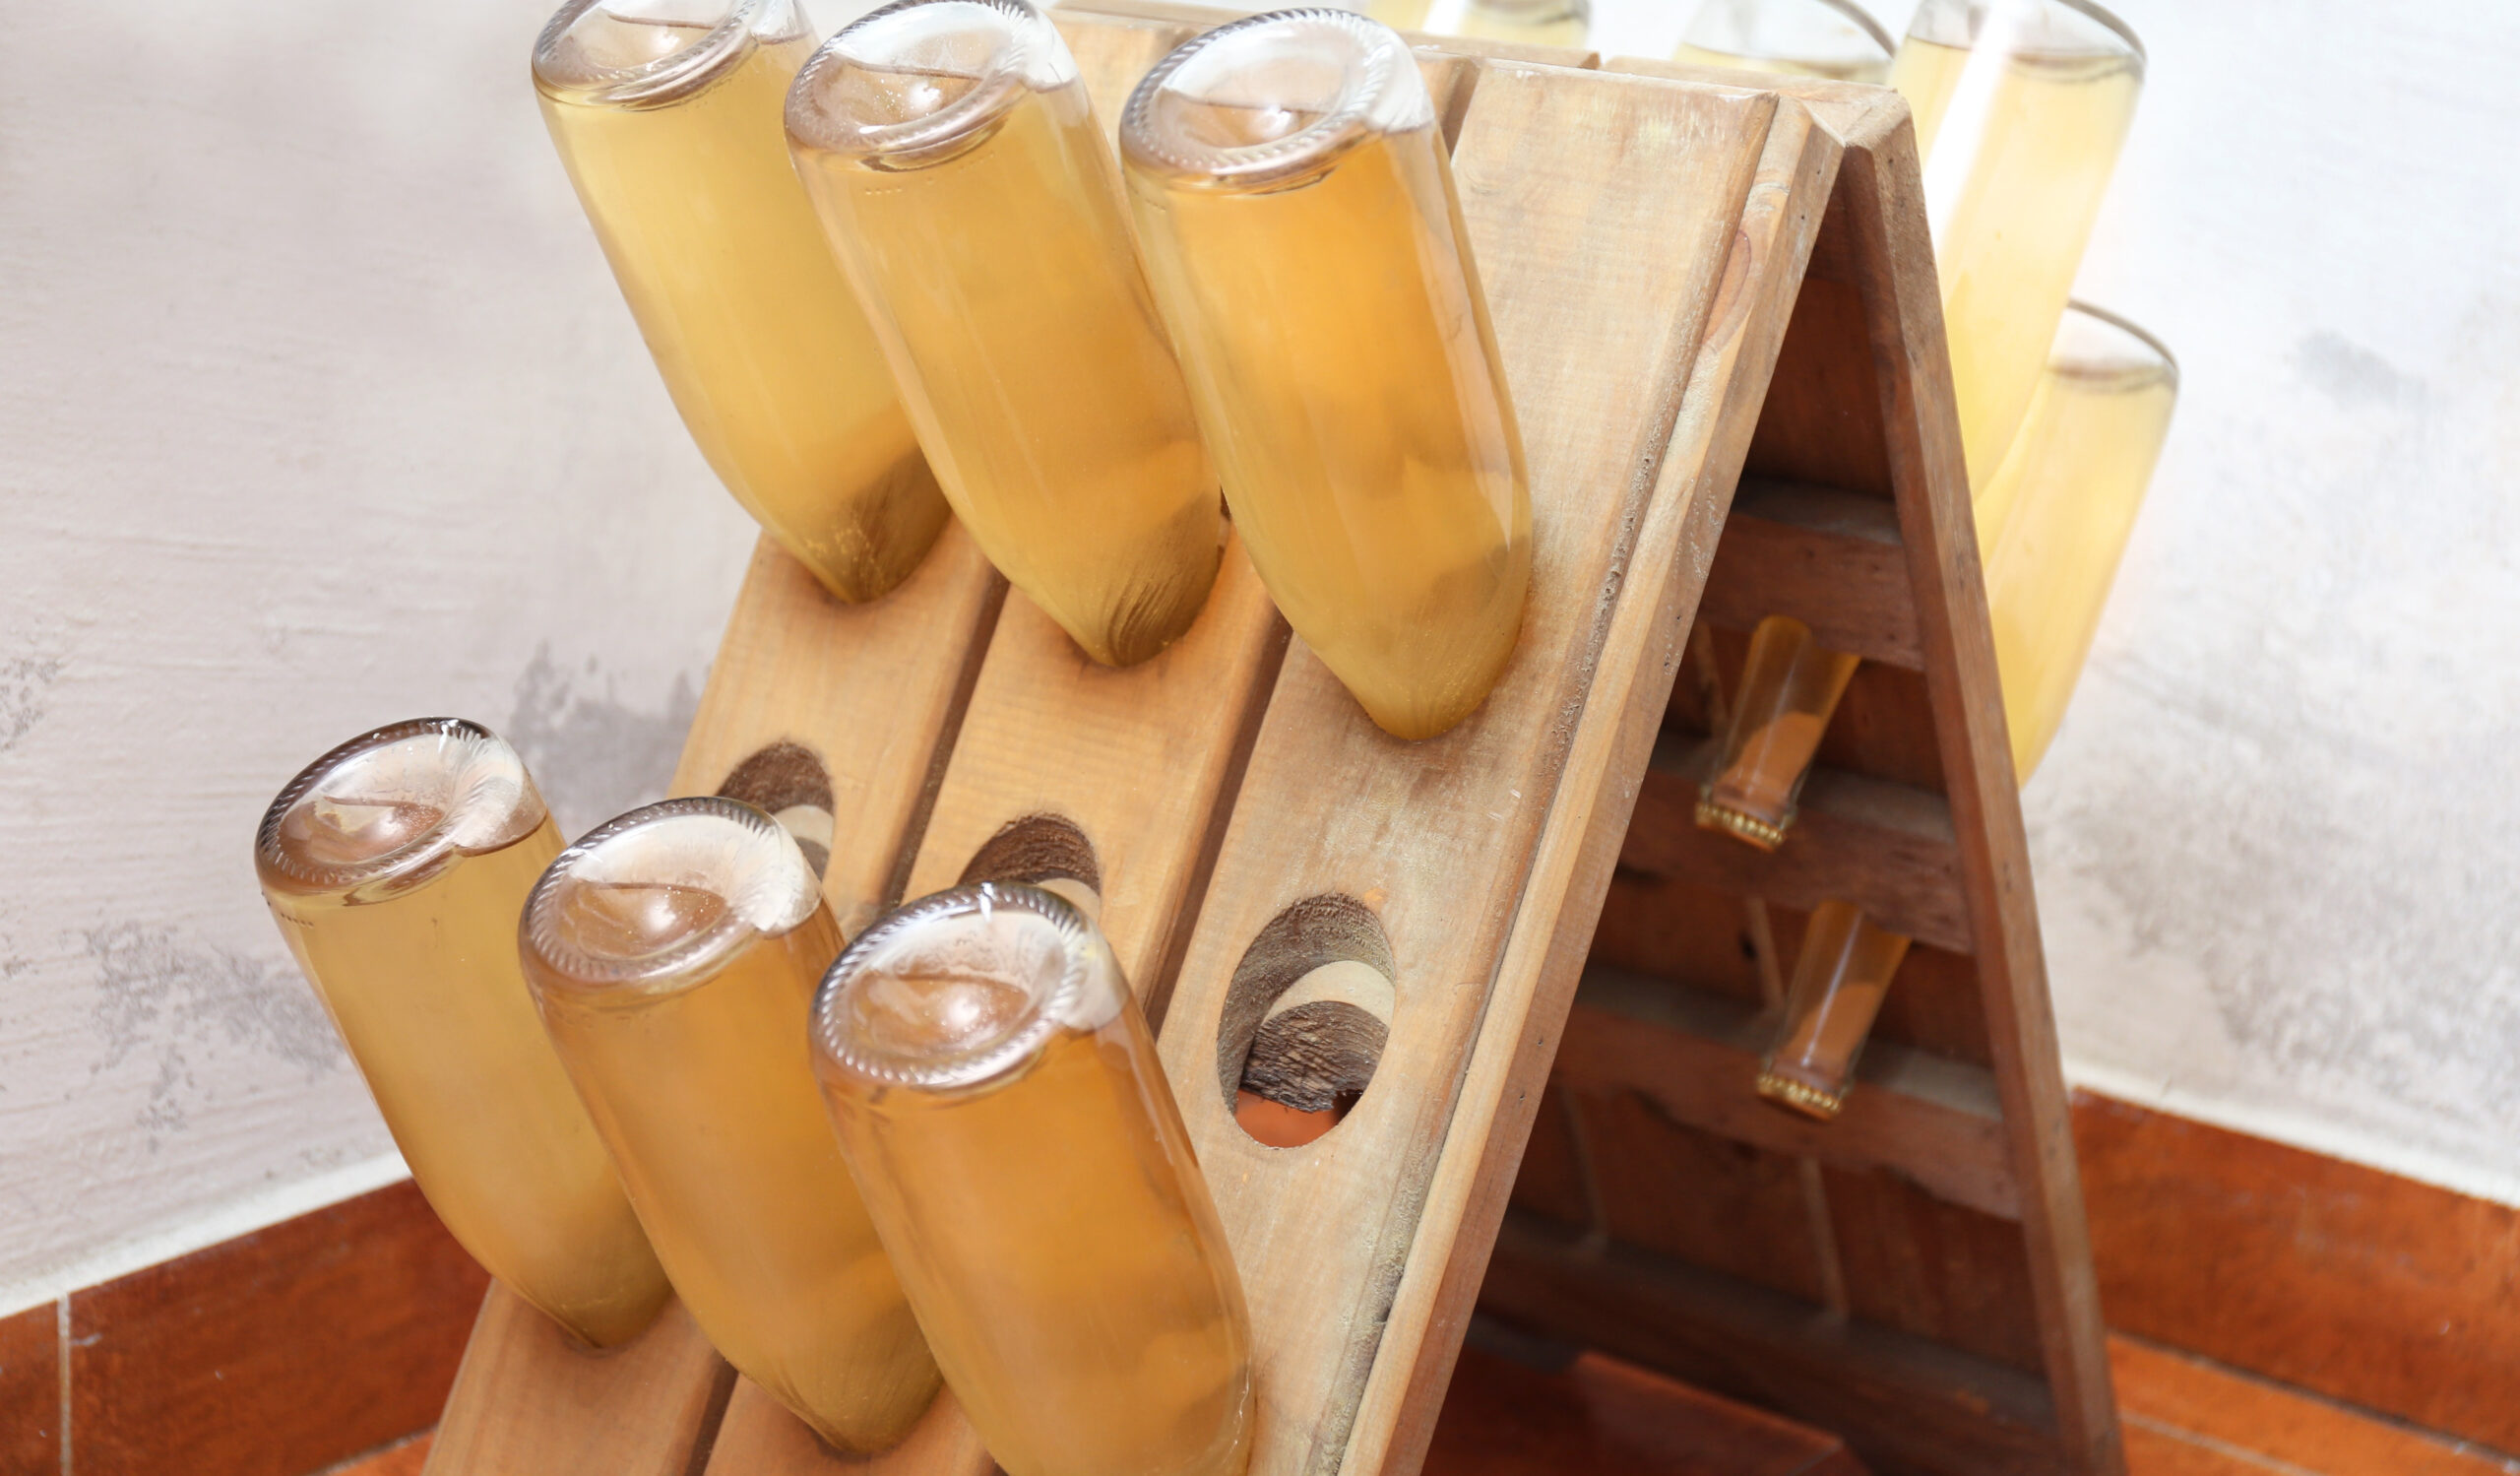
4. Riddle me this
To later disgorge the sparkling wine, the yeast must be high in the neck of the bottle next to the cap. Even upside down, yeast may not settle near the cap on it’s own because it’s so fine it can get stuck on the sides of the bottle. By riddling the bottles, you loosen any yeast from sides of the bottle and clear any particles from the wine above the neck. We don’t need a fancy riddling rack to get the lees near the cap. We can use the boxes our champagne bottles came in!
Equipment needed:
- Inoculated champagne bottles
- Wine boxes
Procedure:
- After the wine has been in the bottle for 12 months (or longer if you desire), place wine boxes in a location where the upside down bottles can be partially removed every day.
- Lift each bottle 4″ out of box, quickly twist 1/4″ turn and drop back into box daily. Repeat daily for 30 days.
Tips:
- Make riddling easy by making it a daily habit: Try to find a place you sit every day to complete the riddling procedure so it becomes part of your routine. I placed my wine boxes where I drink my coffee every morning and completed riddling before the coffee was ready.
5. Make a Dosage (optional)
If you like an extra dry champagne like I do, then you’ll want to create a dosage and add to the wine after disgorgement. However, if you’re happy with a dry sparkler, then you can skip the dosage.
In any case, you’ll want to test with one bottle of your sparkler to know just what you like. This is the time you can check to see what your final ABV will be as well as your pH and acid levels. The acid should be higher than when you inoculated the original wine due to the dissolved CO².
Readings:
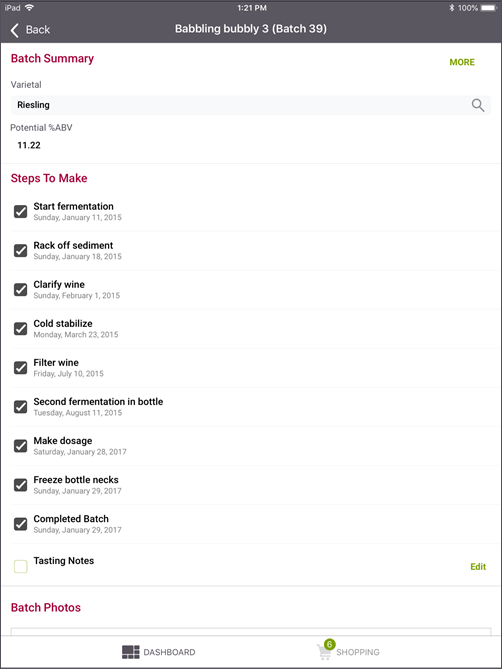
- Final ABV % (at end of second fermentation): 11.22%
- Total acidity (with carbonation): about 12 grams per liter
- pH: 3.00
Ingredients needed (30 ml per bottle):
- Dosage Wine (15 ml per bottle to dosage or 75 ml per gallon of wine)
- Dextrose (15 grams per bottle to dosage or 75 ml per gallon of wine)
- Potassium sorbate (.1 grams per bottle to dosage or .5 grams per gallon of wine)
- Potassium metabisulfite (.06 grams per bottle to dosage or .3 grams per gallon of wine)
Procedure (1 day before disgorging):
- Take readings and test sugar addition using one bottle of unsweetened champagne. The dosage should be to your taste and can be left out if you prefer.
- Make a solution of wine, dextrose, potassium sorbate, potassium metabisulfite for each bottle to be disgorged. Chill overnight to 35-40° F.
Tips:
- Don’t forget the potassium sorbate: The dosage will add more sugar to your wine and we don’t want to continue a further fermentation. An addition of potassium sorbate with any sugar you add will keep the fermentation from starting again.
- Use measurements that work for you: I find it easier to work with liters in doing measurements of additives and weighing small additions of additives, so find a conversion calculator to help you if you’d rather deal in ounces. U.S. measurements do not go low enough to help you with tiny amounts of dry ingredients, so it may be easier to work in gallons.
- Chill your dosage: Make sure your dosage is as cold as the champagne you add it to. Otherwise, you can cause a volcanic eruption as you add it to the wine.
- Make about 25% more than you need: Although my original measurements per 1 ounce dose were correct, because of the disgorging loss, we ended up adding slightly more than expected for each bottle. This left us short when we got to the end of the bottles. Fortunately, we had a bottle of raspberry port to use for the dosage on some. The rest were left extra dry.
6. Disgorging:
Many people leave the lees in the bottle and drink their sparkler without riddling, but there’s something in my nature that won’t let me shy away from a challenge! Instead of either pouring my bubbly with a bottle full of lees or carbonating my still wine, I have to do it méthode champenoise. So I will describe my process for disgorging , which may need a bit of practice.
Equipment needed for Disgorging:
- Bottle caps or hooded wires and champagne corks
- 5 gallon buckets
- ice
- rock salt
- bottle opener (or a disgorging tool, which can be ordered online from France)
Procedure:
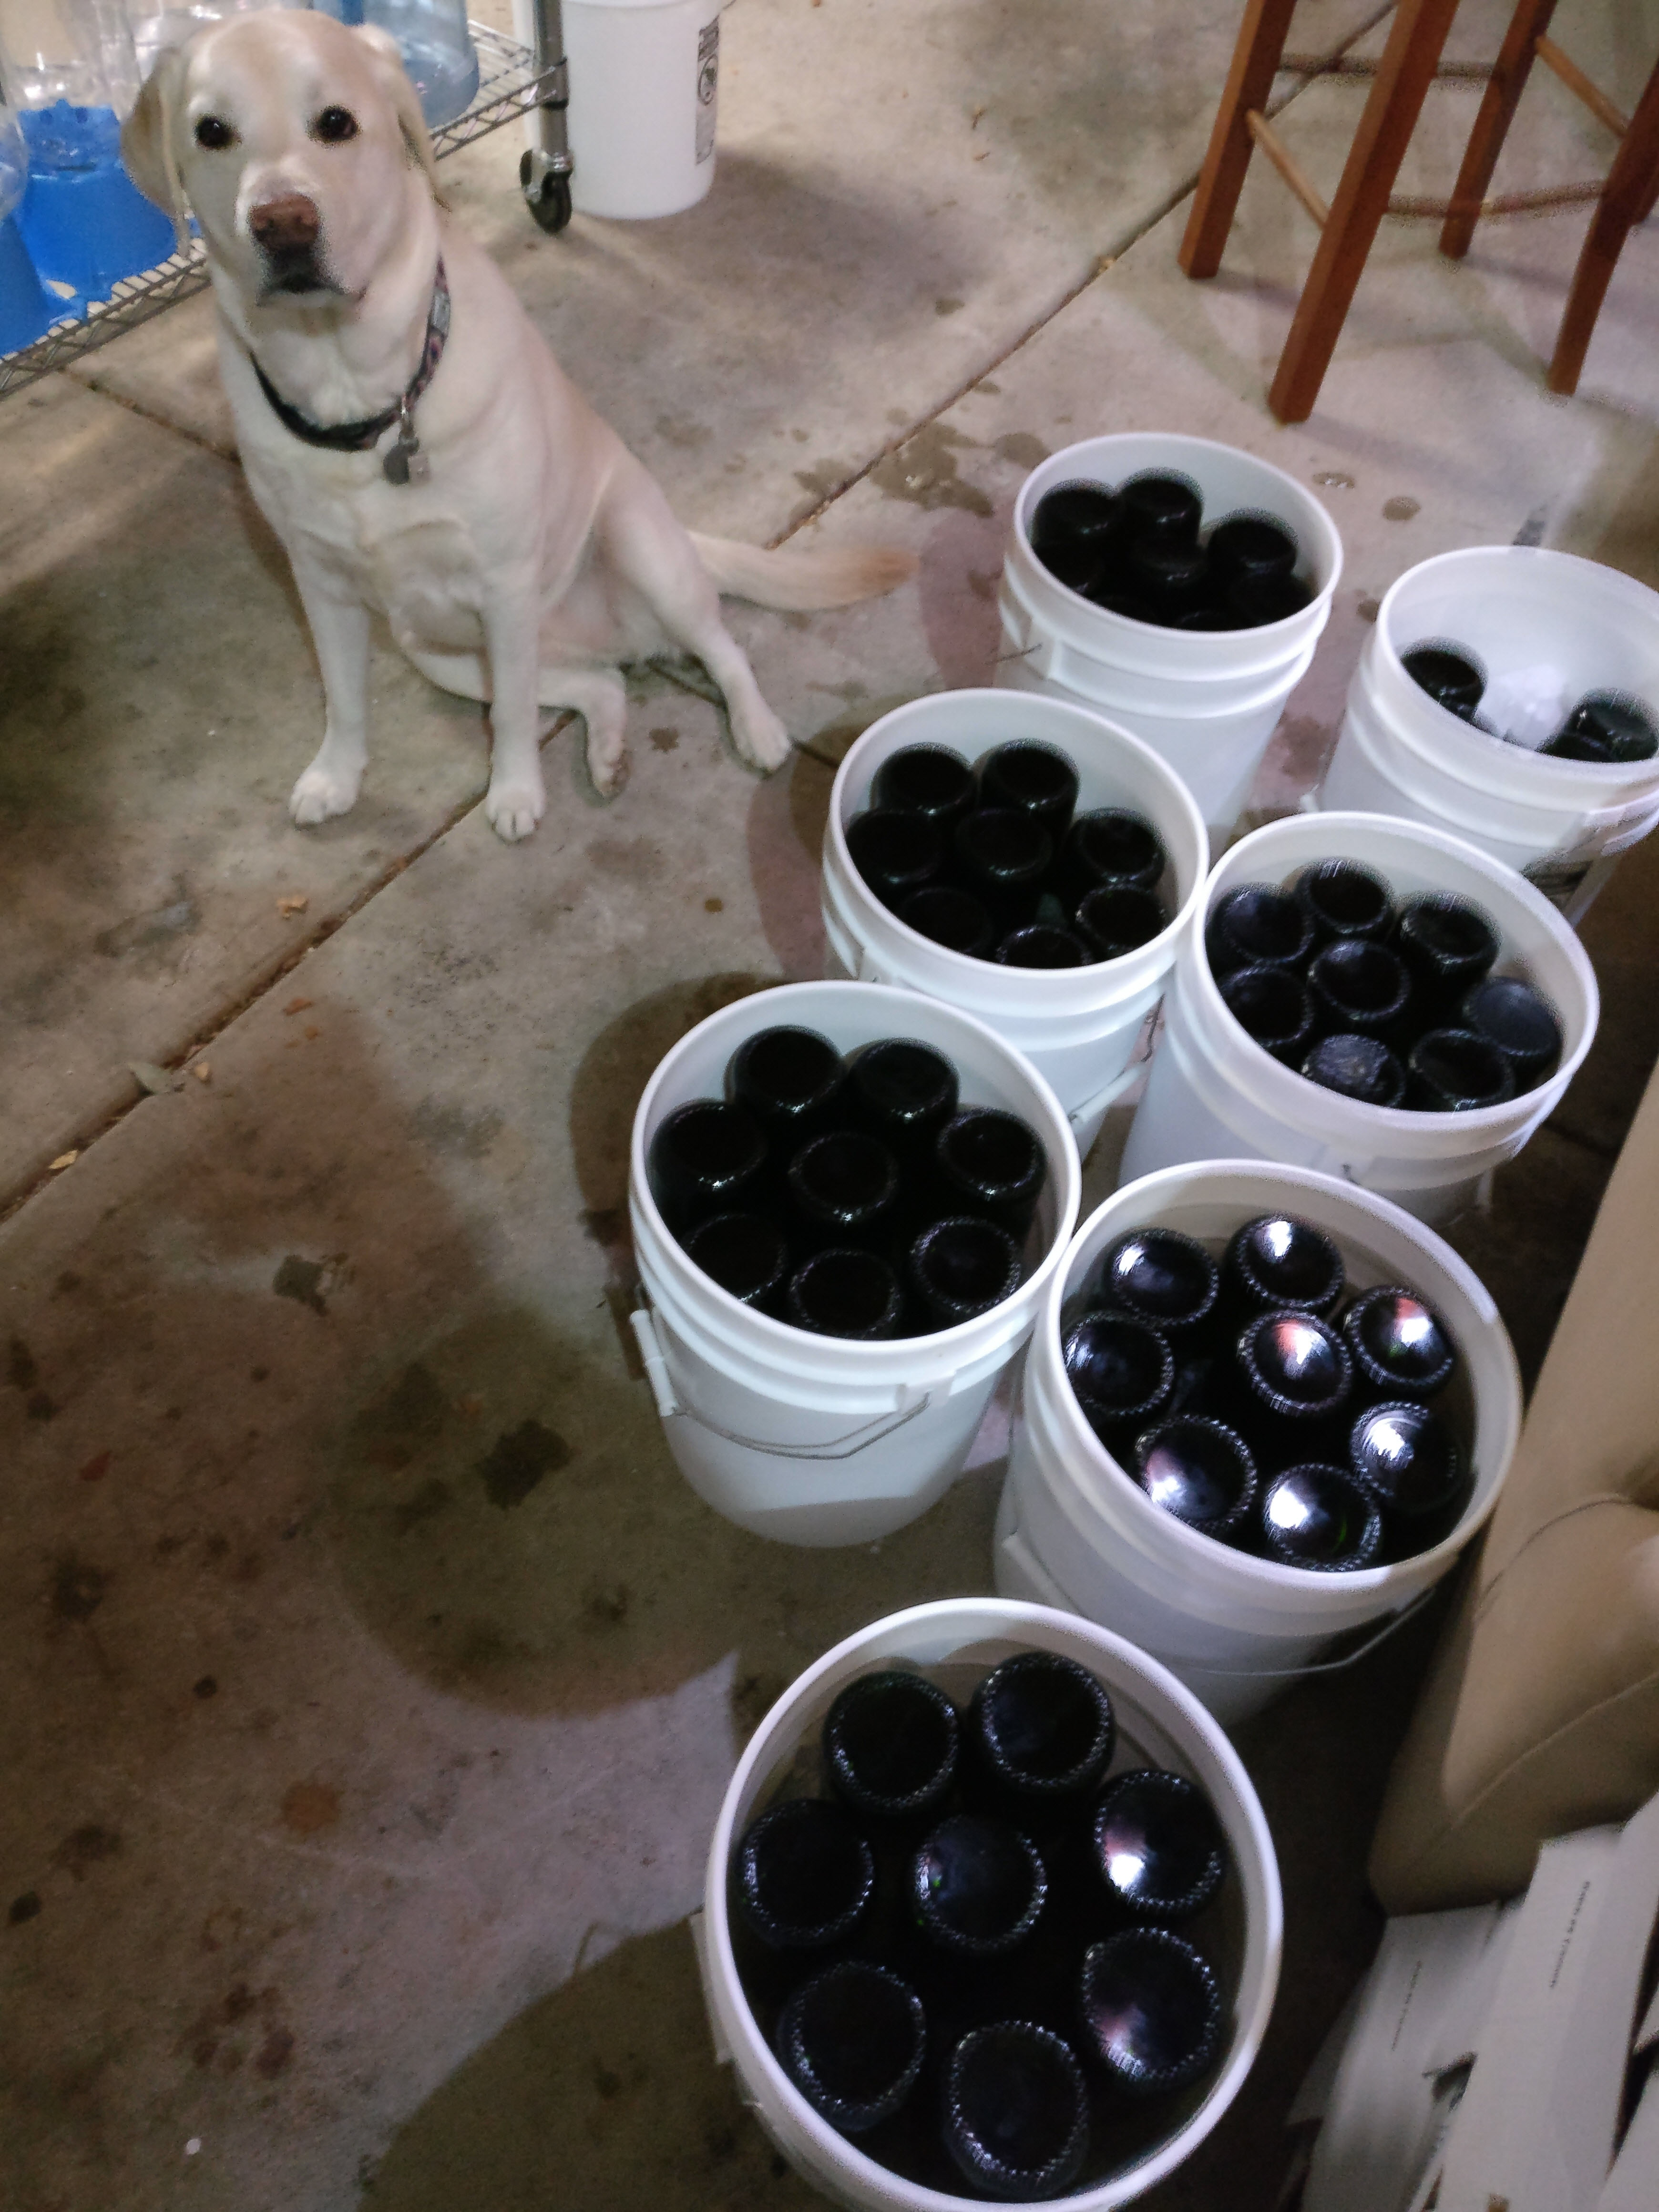
- Fill 5 gallon buckets with ice 3/4 full . Sprinkle rock salt to reduce the temperature.
- Place champagne bottles upside-down in the ice. Let stand for at least 45 minutes, until you can see crystals form in the neck at the top of the yeast plug.
- Pointing the bottle downward and away from you into a box or empty space, hold the neck with your thumb close enough to cover the opening once the plug is out.
- Quickly uncap the bottle, cover the opening with your thumb and turn the bottle right side up in one smooth motion. This should be quick as to prevent too much wine flowing out with the frozen plug!
- Keep your thumb over the opening until the CO2 subsides enough to let go
- Slowly add a 30 ml (or 1 ounce) dosage and cap your wine.
- After wine is capped, rock bottle back and forth several times to integrate the dosage.
Tips:
- Chill your sparkler before disgorging: Place your champagne bottles into a cold refrigerator at the coldest setting for at least 1 week before disgorging. Be extra careful when removing so you don’t disturb the lees!
- Don’t waste your wine: Practice the uncapping and thumb covering a few times on a water filled bottle. It’ll help you get the hang of the motion before you deal with spraying sparkling wine!
- Watch temperatures: Disgorge Champagne while it’s cold outside. You don’t want to fight the temperature outside the bottle while freezing the necks.
- Choose the closure that works for you: After trying plastic champagne corks and Belgian corks at disgorgement, I’m finally going to only use bottle caps. Using plastic on my first batch, I could not get them out of the bottle without a workbench vice (seriously!). Using Belgian corks, we put them in far enough to hood them, but they’re so long, they require a cork screw to remove.
- Top up: If using bottle caps after disgorgement, you may have to sacrifice one bottle of sparkler to top up the bottles before capping. Don’t leave more than 1″ of headspace. If you don’t mind a slightly sweeter sparkler, you can use leftover dosage to top up.
7. Wait
Now that your champagne is clear and complete, all you have to do is wait at least 6 months in bottle for your wine to be ready. My award winning wine was 24 months old from start of fermentation to opening. Make a bunch, so you can open and try it at intervals to see how it’s doing!
Leave a Reply to Bob Joakimson Cancel reply